Lean-To Shed Plans: How to Build a Single-Slope Storage Shed Step by Step
Build a practical lean-to shed with this complete guide. Covers framing the single-slope roof, ledger board attachment, foundation options, and a full material list for common sizes.
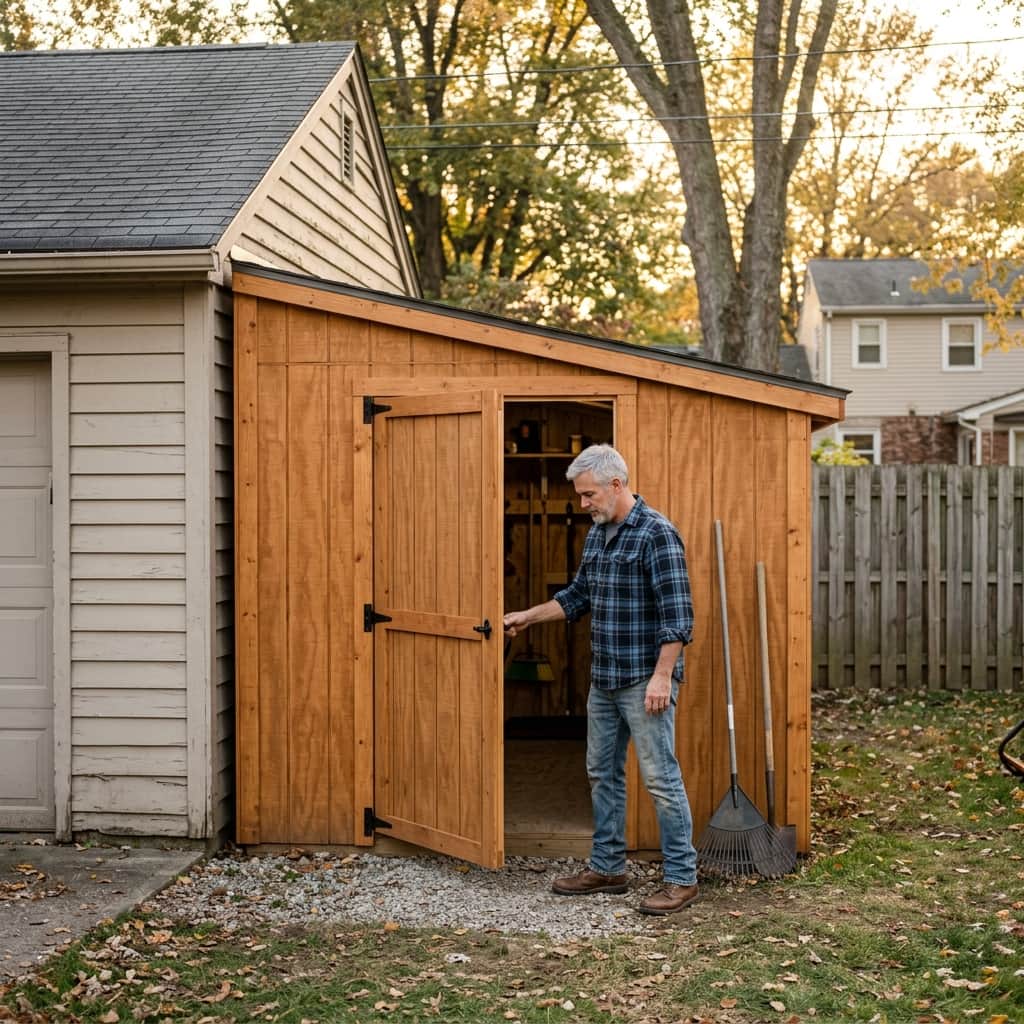
If you have a blank wall on your garage, house, or barn, you already have half a shed built.
A lean-to shed uses an existing structure as one of its walls. That means fewer studs, fewer plates, less siding — and a build that a single person can realistically finish in one weekend. It's the most material-efficient shed design that exists.
But the simplicity is deceptive. The lean-to shed plans that actually work require you to nail the ledger board attachment, the single-slope rafter math, and the flashing details. Skip any of those and you'll have water running down your existing wall within a year.
This guide covers every step — from choosing where to attach the ledger to cutting your last rafter.
What Makes a Lean-To Different from a Standard Shed
The Single-Slope Advantage
A lean-to (also called a shed-roof or mono-pitch design) has one defining feature: the roof slopes in a single direction, from a high wall down to a lower front wall.
This creates several practical advantages:
- One wall is "free" — the existing structure provides it.
- Roof framing is simpler — no ridge board, no opposing rafter pairs to align.
- Water management is predictable — everything drains to one side.
- Material cost drops 25–35% compared to a freestanding gable shed of the same footprint.
Common Lean-To Sizes
The most popular lean-to sizes from the search data are:
- 8x10 lean-to — Compact storage for garden tools and equipment
- 10x12 lean-to — The sweet spot for a workshop or lawn equipment
- 8x12 lean-to — Narrow profile, fits tight spaces along a wall
- 6x12 lean-to — Perfect for firewood storage or a narrow tool run
The principles in this guide apply to all of these sizes. The material list at the end covers the most popular 10x12 configuration.
Step 1: Choose and Prepare the Attachment Wall
Freestanding vs. Attached
You have two options:
Attached lean-to: One side bolts directly to an existing building via a ledger board. This is the classic lean-to configuration.
Freestanding lean-to: The "back wall" is framed independently. It looks and functions like a lean-to but doesn't touch the existing structure. Choose this if your HOA prohibits attachments or if you want the option to relocate the shed.
Ledger Board Installation (Attached)
The ledger board is the single most critical component in an attached lean-to shed. It carries half the roof load and transfers it to the existing structure.
Requirements:
- Use a 2x6 pressure-treated board, cut to the full width of your shed.
- Attach it to the existing wall into the studs — never into siding alone.
- Use 1/2" x 4" lag screws with washers, two per stud.
- Position the ledger at the desired high-side height (typically 8 feet from the shed floor for a comfortable slope).
The most common failure point in a lean-to shed is a ledger board that pulls away from the wall. This happens when builders lag into siding or sheathing instead of hitting structural studs. Use a stud finder, verify with a test drill, and always hit at least four studs across the ledger span.
Flashing the Ledger
Water will find its way behind the ledger if you don't flash it properly.
- Install Z-flashing (also called "kick-out flashing") above the ledger, tucked up under the existing siding.
- Apply a bead of exterior-grade caulk along the top edge where the flashing meets the siding.
- Leave the bottom of the ledger open — it needs to breathe and drain.
This is non-negotiable. Every lean-to I've seen fail structurally started with a water problem behind the ledger.
Step 2: Foundation and Floor Frame
Foundation Options
For most lean-to sheds, the simplest foundation works best:
Gravel pad with PT skids:
- Excavate 4" deep, 1 foot wider than the shed on three sides.
- Fill with compacted 3/4" crushed stone.
- Lay (2-3) 4x6 PT skids perpendicular to the existing wall.
Concrete block piers:
- Set blocks at corners and every 4 feet along the front and back.
- Level precisely — the lean-to floor must be level even though the roof slopes.
Leave a 2-inch gap between the back edge of your floor frame and the existing wall. This gap allows airflow and prevents moisture from wicking between the two structures. It also makes flashing installation much easier.
Floor Frame for a 10x12 Lean-To
- (2) 2x6x12 PT rim joists (parallel to the wall)
- (2) 2x6x10 PT end joists (perpendicular to the wall)
- (6) 2x6x10 PT interior joists at 16" OC
- (4) sheets 3/4" T&G OSB subfloor
Step 3: Wall Framing
A lean-to has only three framed walls (or two, if you're doing the freestanding version with a back wall).
Front Wall (Low Side)
This is the shorter wall where the roof slope ends. Typical height: 6 feet from floor to top plate.
- Stud height: 68-1/2" (accounting for bottom plate + top plate + double top plate)
- Studs at 16" OC
- Include the door rough opening in this wall
Side Walls (Raked Walls)
These are the walls that transition from the low front wall up to the high back wall (or ledger). Each stud is a different height — they step up progressively following the roof slope.
Calculating raked stud heights:
For a lean-to with a 6-foot front wall and an 8-foot ledger height over a 10-foot depth:
- Total rise: 24" (8' minus 6')
- Rise per foot of run: 2.4" (24" ÷ 10')
- Each stud (at 16" OC) is 3.2" taller than the previous one (2.4" × 16/12)
Cut each stud individually. Mark them clearly — they are NOT interchangeable.
Label every raked stud with its position number using a lumber crayon before you stand the wall. Wall #1 stud is shortest (front corner), and each subsequent stud gets progressively taller toward the back. Mixing them up means tearing the wall apart.
Back Wall (Freestanding Only)
If you're building freestanding, the back wall is the tall wall at 8 feet. Frame it identically to a standard shed wall — studs at 16" OC, single bottom plate, double top plate.
Step 4: Single-Slope Roof Framing
This is where a lean-to gets interesting — and where proper lean-to framing plans save you from expensive mistakes.
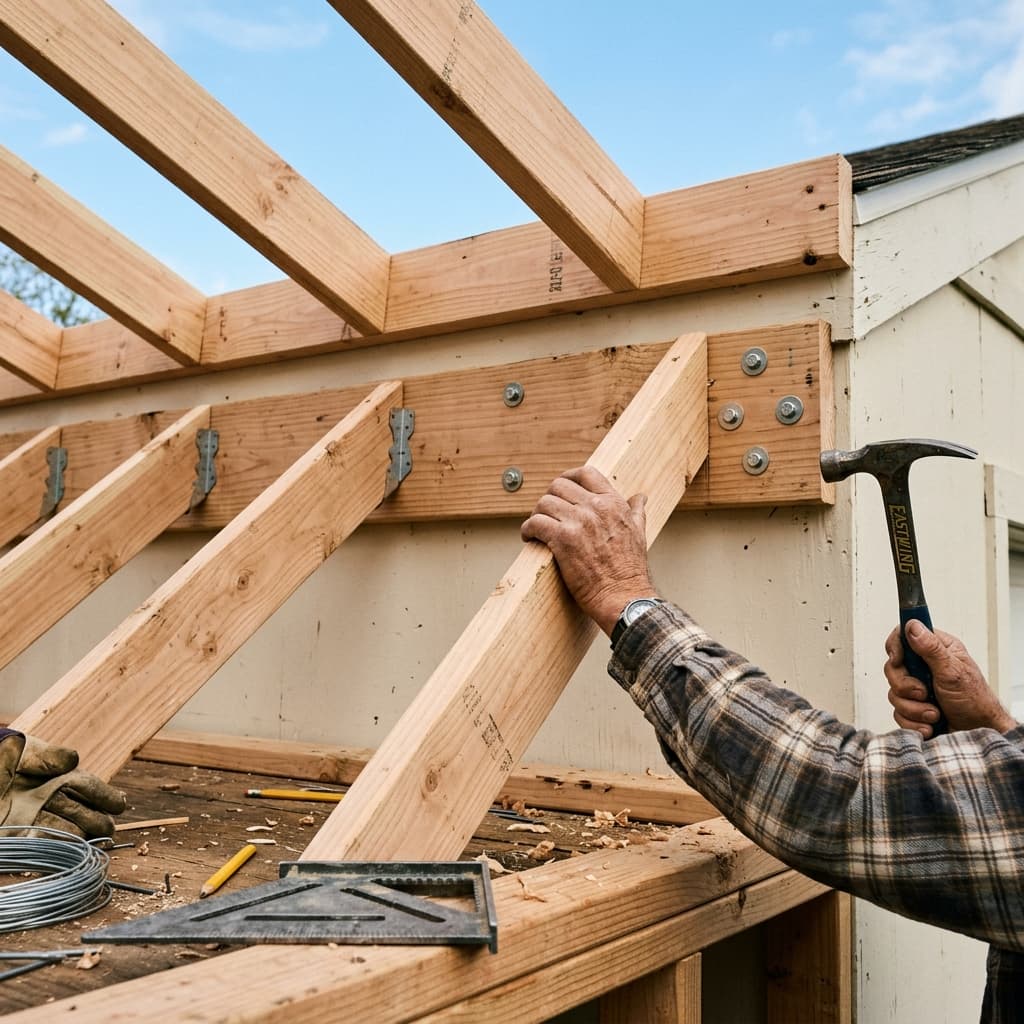
Rafter Layout
Each rafter runs from the ledger board (high side) down to the front wall top plate (low side).
For a 10x12 lean-to with 2-foot rise (6' front, 8' back):
- Roof slope: 2/12 pitch (2 inches of rise per 12 inches of run)
- Rafter run: 10 feet (depth of the shed)
- Rafter rise: 20" (2/12 × 120")
- Rafter line length: approximately 121.7" (~10'2")
- Rafter board size: 2x6x12 — allows for overhang on both ends
Cutting the Rafters
Each rafter needs two cuts:
- Plumb cut at the ledger end — a vertical cut that sits flush against the ledger board.
- Bird's mouth at the front wall — a notch that hooks over the top plate for a secure seat.
For a 2/12 pitch, the plumb cut angle is very shallow — use a Speed Square set to "2" on the Common scale.
On a lean-to roof, the bird's mouth goes on the LOW end (front wall), not the high end. At the ledger, the rafter sits on top of the ledger or hangs from joist hangers. Many DIYers cut the bird's mouth on the wrong end because they're used to gable roof framing where bird's mouths are at the bottom of both sides.
Rafter Attachment Methods
At the ledger (high side):
- Method A (recommended): Rest rafters on top of the ledger and toenail with 16d nails + add hurricane ties.
- Method B: Use LUS26 joist hangers attached to the face of the ledger. This is stronger and easier for solo builders.
At the front wall (low side):
- Bird's mouth seats on the double top plate.
- Toenail with (3) 16d nails per rafter.
- Add hurricane ties (Simpson H2.5) at every rafter.
Sheathing and Roofing
- Sheathe with 7/16" OSB panels, starting from the low edge and working up.
- Install drip edge on all four edges.
- Apply 30# felt underlayment.
- Critical: At the high edge (where the roof meets the wall), install step flashing that tucks under the existing siding. This is where 90% of lean-to roof leaks originate.
- Install asphalt shingles starting from the low edge, working uphill.
Complete Material List: 10x12 Lean-To Shed
Foundation & Floor
- (3) 4x6x12 PT skids
- (6) 2x6x10 PT floor joists (includes rim joists)
- (2) 2x6x12 PT band joists
- (4) sheets 3/4" T&G OSB subfloor (4x8)
- (6) LUS26 joist hangers
- (2) lbs 16d ring-shank nails
Wall Framing
- (35) 2x4 studs at varying heights (see raked wall calculations)
- (2) 2x4x12 bottom plates (front + back if freestanding)
- (2) 2x4x10 bottom plates (sides)
- (2) 2x4x12 top plates + double top plates (front)
- (4) 2x4x10 top/double top plates (sides)
- (1) 2x6x12 PT ledger board (if attached)
- (8) 1/2" x 4" lag screws with washers (ledger attachment)
Roof
- (8) 2x6x12 rafters at 16" OC
- (4) sheets 7/16" OSB roof sheathing (4x8)
- (1) roll 30# felt underlayment
- 45 LF aluminum drip edge
- (3) squares architectural shingles
- (1) bundle starter strip shingles
- 10 LF step flashing (high side wall junction)
- (1) tube roofing sealant
Siding, Door & Trim
- (7) T1-11 siding panels (4x8) — three sides only
- (1) pre-hung 36" exterior door
- (8) 1x4x8 corner and trim boards
- (4) 8' Z-flashing pieces
- (8) Simpson H2.5 hurricane ties
Finish
- (1) tube exterior caulk
- (1) gallon exterior primer
- (2) gallons exterior paint or stain
Estimated Total Material Cost
$1,200–$1,800 for a 10x12 attached lean-to (2026 pricing). The attached design saves roughly $300–$500 compared to a freestanding gable shed of the same size because you eliminate one entire wall and simplify the roof.
Frequently Asked Questions
Can I attach a lean-to shed to my house?
Yes, but check your local building code first. Many jurisdictions allow lean-to structures attached to a primary residence as long as they meet setback requirements and don't create a fire separation issue. You'll likely need a permit, and the ledger board attachment must meet local structural requirements. Some codes require flashing inspections before you can sheathe the roof.
What is the minimum roof pitch for a lean-to shed?
The practical minimum is 2/12 pitch (2 inches of rise per 12 inches of horizontal run). This is the absolute minimum for asphalt shingles — anything flatter requires a rolled roofing or membrane system. For better water shedding and snow load performance, 3/12 or 4/12 is recommended if your wall heights allow it.
How do I calculate raked stud heights for a lean-to?
Subtract the front wall height from the back wall (or ledger) height to get the total rise. Divide by the shed depth in feet to get rise per foot. Then multiply by the stud spacing (in feet) to get the height increment between each stud. The first stud matches the front wall height, and each subsequent stud adds one increment. Always cut and label each stud individually — no two raked studs are the same height.
Is a lean-to shed cheaper than a regular shed?
Yes, typically 25–35% cheaper for the same square footage. You save on one full wall of framing and siding (the back wall is the existing structure), and the single-slope roof uses fewer rafters than a gable design. The trade-off is less headroom on the low side and a design that's visually simpler.
All dimensions and material quantities in this guide are based on standard U.S. residential construction practices using dimensional SPF lumber. Always verify local building codes and adjust specifications with a licensed professional if required in your jurisdiction.
Keep your edges sharp,
– Mark