DIY Farmhouse Dining Table: Build for Under $150 (Plans)
Don't pay $2,000+ at designer stores! Build your own solid wood rustic farmhouse dining table over the weekend. Easy step-by-step plans & cut list inside.
The Heart of the Home
There is no piece of furniture more important than the dining room table. It's where homework is done, holidays are celebrated, and life is shared.
When my wife and I were looking for a new dining table ten years ago, we went to a high-end furniture store and were quoted nearly $3,000 for a solid wood farmhouse table. I took one look at the joinery underneath and realized I could build something much stronger for about $300 in dimensional pine lumber.
Today, I’m sharing the exact process I used to build that table—a table that has survived three kids, countless spilled drinks, and is only looking better with age.
Materials, Budget & Tools Required
Before you begin, you need to head to your local lumber yard. Try to avoid the big box stores for this if you can—you want the straightest, driest boards available. This is a very budget-friendly project, and with careful shopping, you can build this cheap diy farmhouse table under 150 easily.
The Lumber Shopping List:
- (5) 2x8x8 Pine boards (for the top)
- (4) 4x4x8 Pine boards (for the chunky legs)
- (4) 2x4x8 Pine boards (for the aprons and support framing)
The Tool List:
- Circular saw or miter saw
- Drill and impact driver combo
- Pocket hole jig (I recommend the Kreg Jig K4 or pocket hole pocket)
- Random orbital sander (with 80, 120, and 220 grit sanding discs)
- Tape measure and speed square
- At least 4 heavy-duty bar clamps (36-inch minimum length)
When choosing the lumber for your table top, take your time. Look down the edge of each board to check for bowing, twisting, or cupping. Only buy boards that are dead straight.
The Ultimate Farmhouse Table Cut List (6-Foot Version)
This cut list is optimized for a classic 6-foot (72 inches) table which comfortably seats six people. Having this precise list is the key to executing 6 foot farmhouse dining table plans pdf without wasting expensive wood.
| Part Name | Material | Exact Cut Dimension | Qty |
|---|---|---|---|
| Chunky Legs | 4x4 Pine | 28 1/2" | 4 |
| Long Aprons | 2x4 Pine | 64" | 2 |
| Short Aprons | 2x4 Pine | 27" | 2 |
Center Supports | 2x4 Pine | 27" | 2 |
Tabletop Planks | 2x8 Pine | 72" | 5 |
Step 1: Prepping Lumber & Preventing Tabletop Warp
Pine is beautiful and cheap, but it contains a high moisture content. If you bring it straight from the yard and build, it will shrink and warp as it dries inside your climate-controlled home.
To ensure preventing warping in solid wood tabletop builds:
- Acclimatize the wood: Let your lumber sit in your house or garage for at least a week before cutting.
- Inspect grain direction: When laying out the top, alternate the growth rings (one board curving up, the next curving down). This cancels out the natural tension of the wood as it dries.
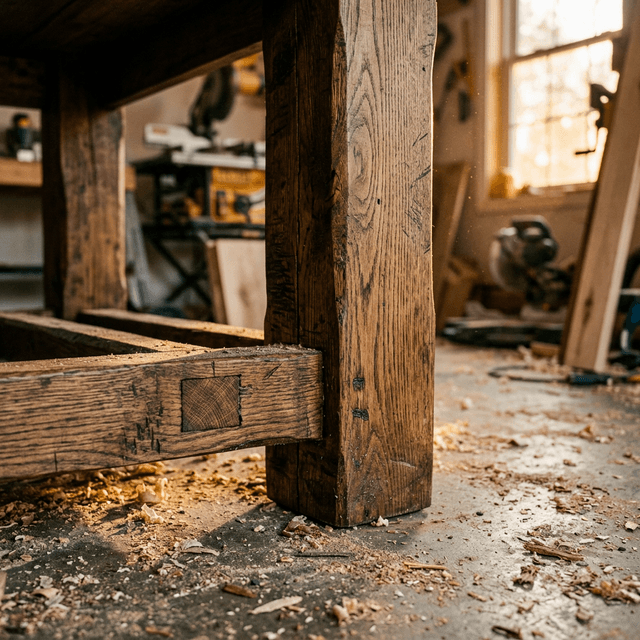
Step 2: Assembling the Heavy-Duty Base
The foundation of a great farmhouse table is its chunky, immovable base. We are going to use the 4x4s for the legs to give it that authentic, heavy rustic look.
- Cut the legs: Cut your four 4x4 legs to exactly 28 ½ inches long.
- Cut the aprons: Use your 2x4s to cut two long aprons at 64 inches and two short aprons at 27 inches.
- Drill pocket holes: Drill two pocket holes on each end of all four apron pieces. Make sure your jig is set for 1 ½ inch thick material.
- Assemble: On a flat surface, attach the aprons to the legs using wood glue and 2 ½ inch pocket hole screws. Recess the aprons about ½ inch in from the outside face of the legs to give it depth.
Always use a copious amount of standard yellow wood glue in every joint. The pocket hole screws act as internal clamps holding the wood together while the glue dries, but the glue is what actually provides the long-term strength.
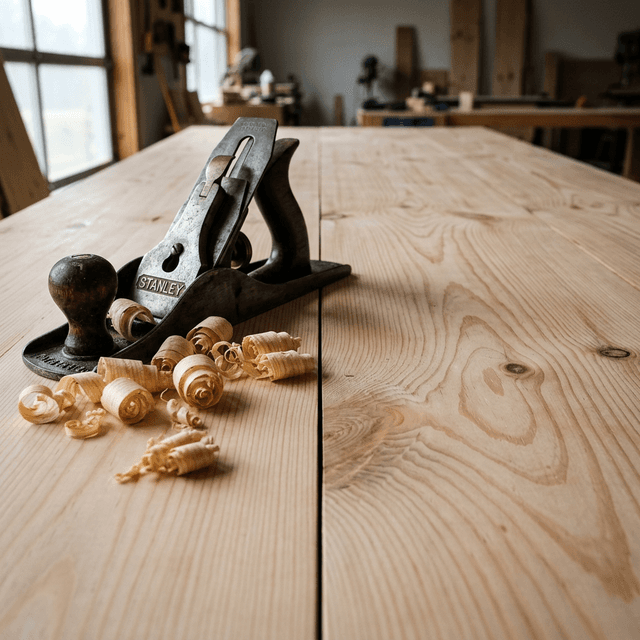
Step 3: Edge-Gluing the Tabletop Like a Pro
This is the part that intimidates most beginners, but learning how to join pine boards for table top builds is incredibly satisfying once you know the secret of edge-gluing.
- Cut to length: Cut your five 2x8 boards to 72 inches.
- Lay them out: Arrange them on your workbench or the floor. Flip them around until the grain patterns look pleasing and the boards sit nicely against each other.
- Glue and clamp: Turn the boards on their sides, apply a liberal zig-zag of wood glue, lay them flat, and clamp them together using your long bar clamps. Alternate clamps on the top and bottom to prevent the newly formed top from bowing upward.
Do NOT use pocket holes to attach the boards of the tabletop to each other. Seasonal wood expansion and contraction will eventually cause the top to split if it's screwed rigidly together. Wood glue alone is much stronger.
Step 4: Sanding, Assembly, and Allowing Wood Movement
Once the glue has cured overnight, remove the clamps.
- Sand it flat: Start with 80-grit sandpaper on your orbital sander to level out the joints. Move up to 120-grit, and finish the entire top and base with 220-grit until smooth to the touch.
- Attach the top safely: Place the tabletop face down on a blanket. Center the base upside down on top of it. Use "figure-eight" tabletop fasteners or Z-clips to attach the base. Do not screw the base directly into the top with regular pocket screws; the wood needs to expand horizontally as seasons change, or it will crack itself apart.
Step 5: Finishing the Rustic Masterpiece
Pine is notorious for absorbing stain unevenly, leaving you with splotchy, dark spots. To get that beautiful, high-end furniture store look, you must select the best finish for rustic dining table wood and prep correctly:
- Apply Pre-Stain Wood Conditioner: Do not skip this! Paint on a coat of oil-based pre-stain conditioner and let it sit for 15 minutes before wiping off the excess. This penetrates the wood and ensures the stain goes on completely even.
- Stain: Apply your favorite wood stain (Dark Walnut or Early American look stunning on pine). Wipe with the grain.
- Seal and Protect: Apply at least three coats of a high-quality water-based polyurethane to protect the tabletop from water rings, hot plates, and messy kids. Lightly sand with 320-grit sandpaper between coats for a glass-smooth finish.
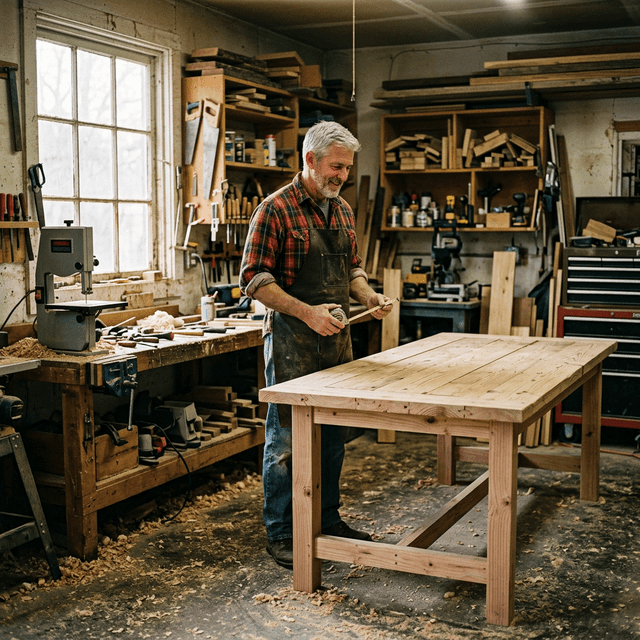
The Finished Masterpiece
When you flip that table over and set it in your dining room, there is a tremendous sense of pride.
You just built a solid wood piece of furniture that is stronger, cheaper, and more personal than anything you could buy in a store. Enjoy the process, don't rush the sanding, and get ready to host your next family dinner!
Keep your edges sharp,
– Mark