Build Minimalist Floating Shelves in a Weekend
Get that custom built-in look without the contractor price tag. A beginner-friendly guide to building rock-solid floating shelves.

The "Magic" of Floating Shelves
There is something deeply satisfying about a floating shelf. No brackets, no bulky corbels, just a clean line of wood hovering on the wall. They make any room look modern, intentional, and expensive.
But if you buy them from big-box stores, they're often hollow, flimsy honeycomb cardboard that sags if you look at it wrong.
The Solution: Build your own.
For less than $50 in lumber, you can build solid wood shelves that can hold heavy books, plants, and your cat (who will inevitably sit on them).
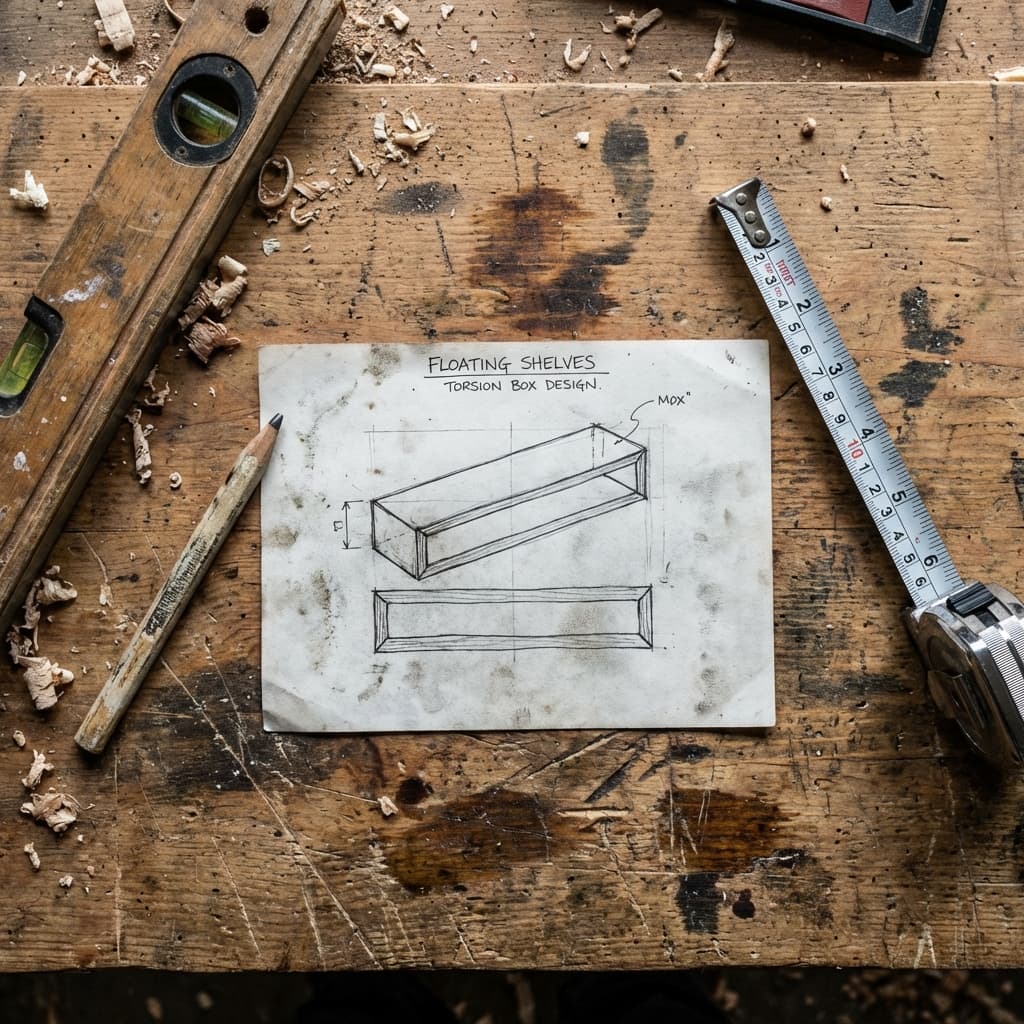
How It Works: The Torsion Box
We aren't just gluing wood to the wall. We are building a "sleeve" that slides over a hidden frame.
- The Bracket (Cleat): A "E" shaped frame made of 2x4s that is screwed into your wall studs.
- The Box (Shelf): A hollow plywood box that slides perfectly onto the bracket.
This design is incredibly strong because the weight is distributed across multiple studs.
Materials List (For two 3-foot shelves)
- 1x 2x4x8 Stud: For the internal bracket.
- 1x 4x8 Sheet of ¼" Plywood (or ½" for beefier shelves): For the top and bottom skins.
- 1x 1x4x8 Common Pine: For the front face and sides.
- 3" Deck Screws: To attach bracket to wall.
- 1 ¼" Brad Nails: To assemble the box.
- Wood Glue: Essential.
- Stain/Paint: Your choice.
Lumber Choice: For the face (the part you see), buy "Select Pine" or Poplar. It costs a few dollars more than common construction lumber but requires 90% less sanding to look good.
Step 1: Find Your Studs (Critical)
This is the most important step. If you miss the studs, your shelf will fall off.
Use a stud finder to mark the center of every stud in the area you want the shelves. Mark these locations on your 2x4.
Step 2: Build the Internal Bracket
Cut your 2x4 to the length of your shelf (minus 1 inch, to fit inside the box). Then cut "fingers" (supports) that stick out. These should be 2 inches shorter than your final shelf depth.
Screw the fingers into the long back piece. You now have something that looks like a rake or an "E".
Drill Pilot Holes: 2x4s can split near the ends. Always drill a pilot hole before driving those long 3" screws to connect the fingers to the backer.
Mounting: Screw this bracket to the wall, driving 3" screws through the backer and INTO the wall studs you marked. Use a level. Check it twice. This bracket should be rock solid—you should be able to do a pull-up on it (but don't).
Step 3: Build the Box
Now we build the "skin" that slides over the bracket.
- Cut the top and bottom plywood pieces. They should be the exact size of your finished shelf.
- Cut the front face and side caps from your 1x4 (ripped down to match the total thickness).
Glue and nail the plywood skins to the front and side pieces. You are basically building a drawer with no back.
Test Fit: Slide your hollow box over the bracket on the wall. It should be snug. If it's too tight, sand the bracket fingers slightly. If it's loose, wrap a piece of masking tape around a finger to shim it.
Step 4: Sanding and Finishing
Take the box off the wall. It's time to make it pretty.
- Fill the nail holes with wood filler.
- Sand everything to 220 grit.
- "Break" (slightly round over) the sharp corners so they feel soft to the touch.
- Apply your stain or paint.
Conditioner is Key: If you are staining pine, use "Pre-Stain Wood Conditioner" first. Pine is notorious for soaking up stain unevenly (blotchy). The conditioner prevents this and gives you a pro finish.
Step 5: Final Installation

Slide your finished shelf back onto the wall bracket.
To keep it from sliding off (if an earthquake hits), drive one small screw up through the bottom plywood skin into one of the bracket fingers.
That's it. You're done.
Why DIY Beats IKEA Here
- Custom Size: You fit the shelf to your wall, not the other way around.
- Strength: Solid connection to studs means no sagging.
- Pride: Every time you reach for a book, you know you built that.
Floating shelves are the perfect weekend project. They teach you accuracy (getting that box to fit the bracket) but forgive small mistakes (it's painted!).
Go find some studs and make some dust.
– Mark