Build a Classic Adirondack Chair (That Doesn't Wobble)
The ultimate summer project. Learn how to build a comfortable, durable outdoor chair that will last for 20 years. No complex joinery required.
The Seat of Summer
There is no piece of furniture more iconic than the Adirondack chair. Low profile, wide armrests for your drink, and a slanted back that practically forces you to relax.
Buying a real one (made of solid wood, not plastic) costs $300+. Building one? About $60 in lumber.
But here is the challenge: Comfort. A badly designed Adirondack chair hurts your back. The slats are too far apart, or the angle is too steep.
This guide focuses on the "Classic Comfort" design—curve in the back, curve in the seat, and flat armrests wide enough for a dinner plate.
Materials: Choosing Wood for Outdoors
Indoor furniture is easy. Outdoor furniture is war.
Sun (UV) destroys wood cells. Rain swells them. Winter freezes them. You need wood that fights back.
Options:
- Western Red Cedar: The best choice. Naturally rot-resistant, lightweight, and smells amazing. Weathers to a silvery gray.
- Cost: $$$
- Cypress: Similar to cedar, very durable wet or dry.
- Cost: $$
- Pressure Treated Pine (PT): Inexpensive and rot-proof. Heavy and tends to warp as it dries. If you use PT, buy "Kiln Dried After Treatment" (KDAT) if you can find it.
- Cost: $
Hardware Matters: Do not use zinc screws. They will rust in 6 months and streak your chair with black tears. Use Stainless Steel or Coated Deck Screws.
The Tools
- Jigsaw: Essential. There are lots of curves in an Adirondack chair.
- Drill/Driver: For assembly.
- Sander: 80 and 120 grit. You don't want splinters on a seat.
- Measuring Tape & Square.
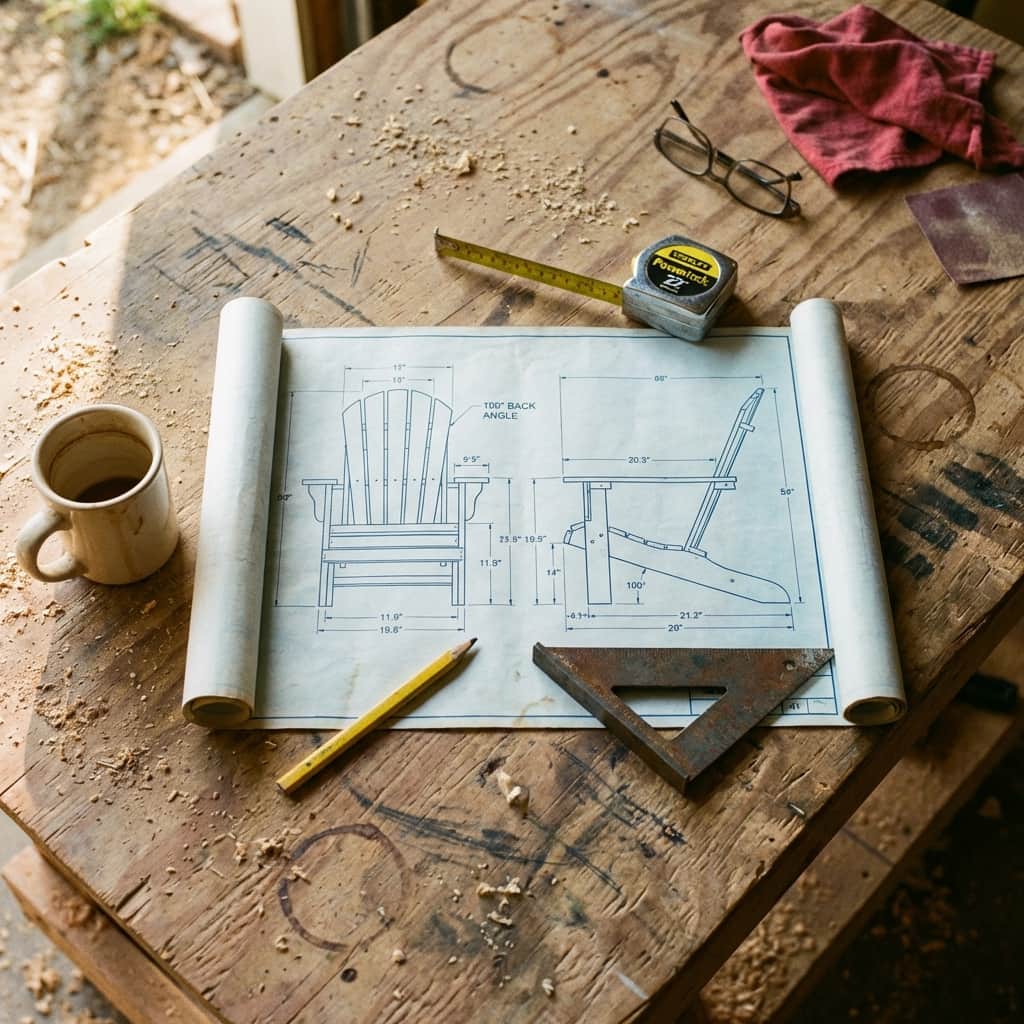
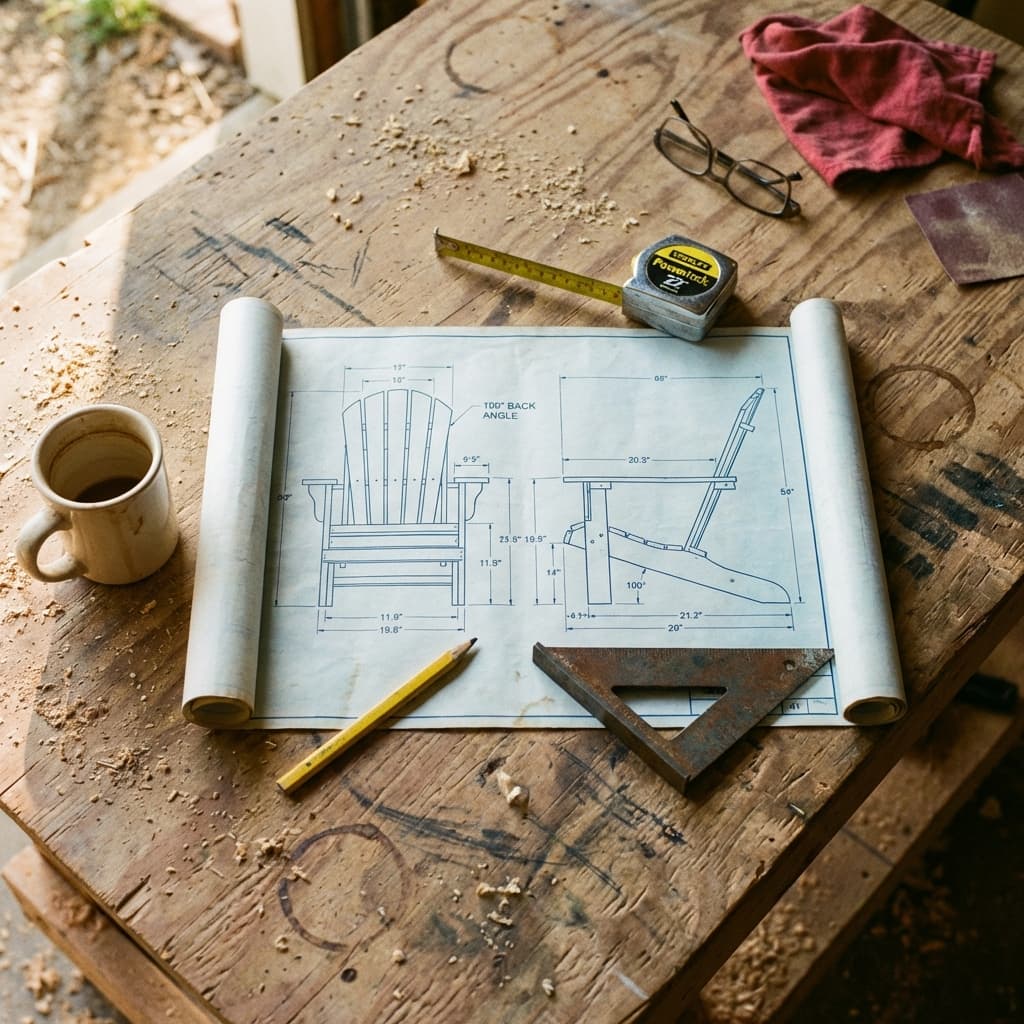
Step 1: The Templates (Don't Skip This)
This project has curved parts: the side rails (legs) and the seat support.
Don't draw these directly on your expensive cedar. Draw them on a piece of cardboard or cheap ¼" plywood first. Make a template. Trace that template onto your lumber. This ensures both sides of the chair match perfectly. If they don't match, your chair will rock like a bad table.
Step 2: Cutting the Curves
This is the fun part.
Clamp your wood to a workbench. Use your jigsaw to cut the curve. Don't try to be perfect. Cut slightly outside the line (leave 1/16th of an inch). Then, clamp the two matching pieces together and sand them down to the line simultaneously. This guarantees they are identical twins.

Step 3: Assembly - The Base
The Adirondack chair is built like a tank.
- Attach the front legs to the side rails using carriage bolts.
- Bolts are better than screws here because this joint takes all the stress when you sit down.
- Connect the two sides with the front spreader board.
Pre-Drill EVERYTHING: Cedar splits easily, especially near the ends. If you drive a screw without a pilot hole, you WILL crack your $20 board.
Step 4: The Slats (The Comfort Zone)
Install the seat slats first. Space them about ¼" apart to let rainwater drain through. Spacers (like a scrap piece of plywood) help keep the gaps consistent.
Then, the back slats. This is where you can get creative. You can cut the tops in a curve (traditional), a point (modern), or leave them square. Fan them out neatly. Attach the bottom screw first, measure the top spacing, then drive the top screw.
Step 5: The Armrests
The defining feature. These should be wide (5.5 inches minimum). They sit on top of the front legs and are supported by triangular brackets in the back. Check level. Before you screw them down, put a level on them. If your drink slides off, you failed.
Step 6: Finishing
If you used Cedar or Cypress, you don't have to finish it. It will turn gray naturally. But if you want to keep that red color, you need a UV blocker.
Use a penetrating oil finish (like Australian Timber Oil). Do NOT use polyurethane (varnish). The sun will peel it in one season, and you will have to scrape it off. Oil fades gracefully; you just wipe on a fresh coat next year.
Build Two
Here is the secret: It takes 4 hours to build one chair. It takes 5 hours to build two.
Since you have the templates and the tools out, just cut double the parts. You'll want a pair anyway.
Enjoy your sunset.
– Mark