Mastering Wood Finishes: From Oil to Polyurethane
Don't ruin a perfect build with a bad finish. Learn how to choose the right protection for your project, from simple oils to durable polyurethanes.
The Make-or-Break Moment
You've spent weeks measuring, cutting, and sanding. Your joinery is tight. The project looks beautiful in raw wood.
Now comes the terrifying part: applying the finish.
We've all been there—applying a stain that turns blotchy, or a varnish that catches dust and never seems to dry. The finish can elevate a humble pine shelf into a showroom piece, or it can turn a walnut masterpiece into a plastic-looking disaster.
In this guide, we're going to demystify wood finishing. We'll break down the confusing aisle of cans into three simple categories and tell you exactly when to use each one.
Step 0: It All Starts with Sanding
Before you even open a can, accept this truth: The finish doesn't hide mistakes; it highlights them.
If you have scratch patterns from 80-grit sandpaper, the stain will pool in them and make them dark, ugly streaks. If you have glue squeeze-out you missed, the finish won't stick to it, leaving white spots.
The "Golden Rule" of Sanding: Never skip a grit. If you start at 80, go to 100 (or 120), then 150, then 180, then 220. Skipping from 80 to 220 leaves deep scratches that the finer paper can't remove.
Water Popping (The Secret Weapon)
If you are using a water-based finish, wipe the wood with a damp cloth after your final sanding. This "pops" the grain (raises the fibers). Let it dry, then lightly sand again with high grit (220/320). This ensures your final finish stays smooth as glass.
Category 1: Oil Finishes (The "Natural" Look)
Examples: Boiled Linseed Oil, Tung Oil, Danish Oil.
These are "penetrating" finishes. They soak into the wood fibers rather than sitting on top.
Best For:
- Tools handles
- Decorative boxes
- Low-wear furniture (bookshelves)
- Projects where you want to feel the texture of the wood
Pros:
- incredibly easy to apply (wipe on, wipe off)
- repairs are seamless (just add more oil)
- enhances wood grain beautifully
Cons:
- Low protection against water and scratches
- Takes a long time to cure
Spontaneous Combustion Danger: Rags soaked in oily finishes generate heat as they dry. If you throw them in a pile, they can catch fire. Always lay oily rags flat outside to dry completely before throwing them away, or store them in a metal can with water.
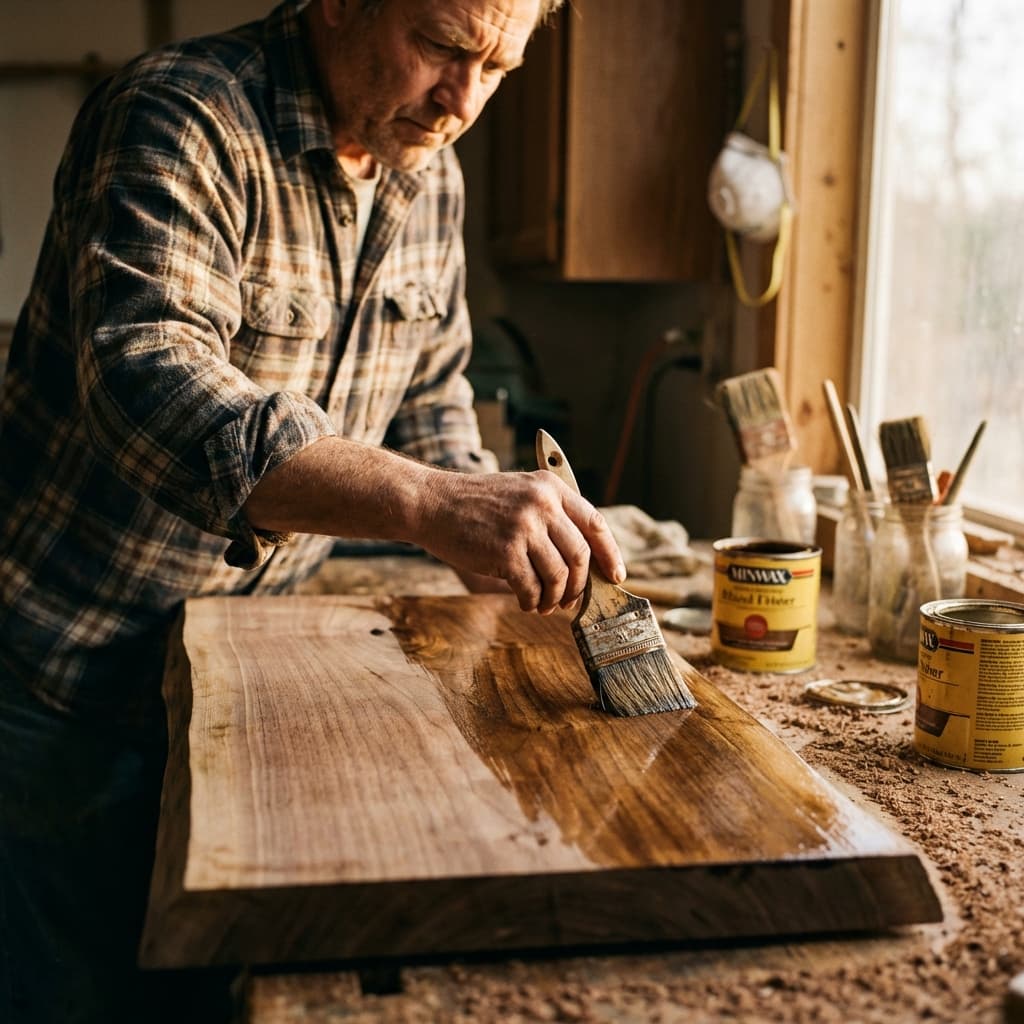
How to Apply
Flood the surface with oil using a rag. Let it soak for 15-20 minutes. If spots look dry, add more. After 20 minutes, wipe it ALL off. Seriously. If you leave a puddle, it will become a sticky, gummy mess that never dries.
Category 2: Film Finishes (The Armor)
Examples: Polyurethane (Oil-based and Water-based), Varnish, Lacquer.
These build up a layer on top of the wood. They are like wrapping your project in a clear plastic sheet (but nicer).
Best For:
- Dining tables
- Coffee tables
- Outdoor furniture (Spar Urethane)
- Flooring
Oil-Based Polyurethane
The classic yellow/amber tone. It's tough as nails.
- Pros: Durable, adds warmth to wood.
- Cons: Smells strong, takes 4-8 hours to dry between coats, can yellow over time.
Water-Based Polyurethane
The modern standard. Milky white in the can, dries crystal clear.
- Pros: Low odor, dries in 1-2 hours, stays clear (doesn't yellow).
- Cons: Can look "cold" or "plastic" on dark woods like walnut unless you use a sealer first.
For the ultimate finish on a dining table, use Dewaxed Shellac as a sealer coat to bring out the color, then top it with 3 coats of Water-Based Polyurethane for protection. You get the warmth of oil with the speed and durability of modern tech.
The Hybrid: Wipe-On Poly
If you want the protection of poly but hate the idea of brush marks, make your own "Wipe-On Poly."
Mix 50% Oil-Based Polyurethane with 50% Mineral Spirits.
Wipe it on with a rag just like an oil finish. It builds a film like poly but thinner. You'll need more coats (6-8 instead of 3), but it dries faster and is virtually foolproof. No bubbles, no brush hairs, no drips.
The Recommended Strategy for Beginners
Don't overcomplicate it. Adopt a "Go-To" finish for 90% of your projects so you can master it.
My suggestion:
Use Danish Oil (Natural or Medium Walnut).
It's actually a blend of oil and varnish. You get the easy application of oil with a bit of the protection of varnish. It looks fantastic on pine, plywood, and hardwoods alike. It's almost impossible to mess up.

A Note on Plan Selection
Choosing a finish is often dictated by the project's purpose. A garden bench needs UV protection. A cutting board needs food-safe mineral oil.
Most beginner mistakes usually happen before the finish is even bought—in the planning stage. If you build an outdoor table with indoor joinery, no amount of spar varnish will save it from warping next season.
Summary Checklist
- Sanding is 80% of the job. Don't skip grits. 120 -> 150 -> 180/220.
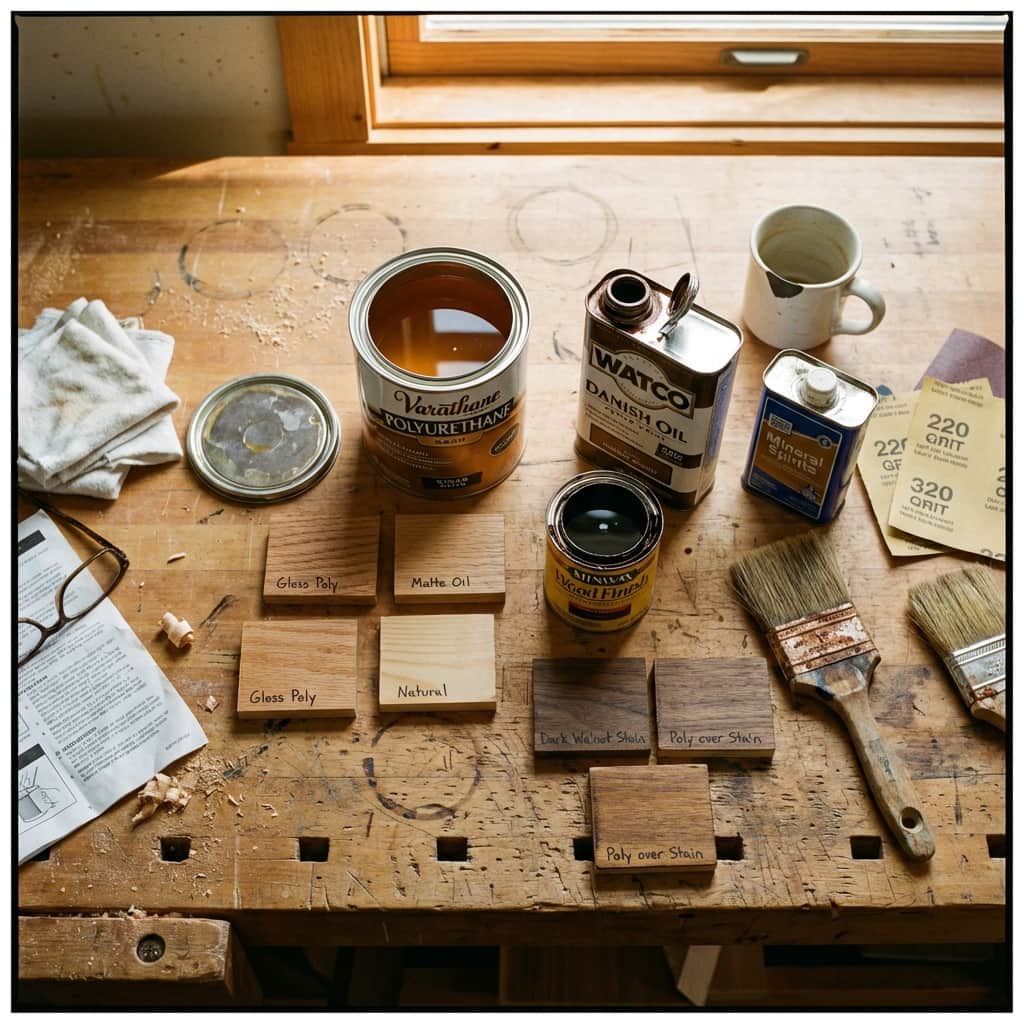
- Remove dust. Use a tack cloth or vacuum before finishing.
- Test first. Always apply finish to a scrap cutoff from your project to see how it looks.
- Ventilation. Open a window or wear a respirator, especially with oil-based products.
- Patience. Two thin coats are always better than one thick, drippy coat.
Finishing doesn't have to be scary. Start with a simple wipe-on oil finish on your next build, and marvel at how the grain pops. It's the moment your "project" becomes "furniture."
Happy finishing!